How does yoga benefit the hair?
Yoga poses are widely known for their positive impact on fitness, emotional health, and internal organs. You can add healthier hair to that long list of yoga benefits. As Kerry Fisher, a celebrated yoga teacher, pointed out, “The yoga poses that are considered by some to be good for hair growth are divided into those poses that bring blood to the scalp, like inversions, and those poses that are relaxing to the body since the idea is that when your body is at rest, your body can regenerate itself.
Therefore, yoga improves hair growth by:
- Boosting blood circulation in the scalp
- Improving metabolism and therefore nourishing hair follicles
- Reducing stress and anxiety.
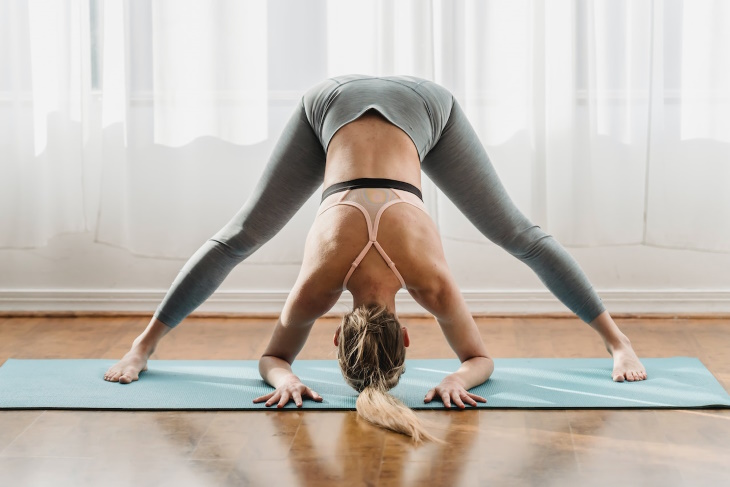
Fisher pointed out the following asanas as being the most beneficial for hair growth: “Inversions like the shoulder stand, headstand, handstand, downward facing dog, and rabbit pose are all considered good for hair growth. Calming poses like child’s pose, fish pose, camel pose, thunderbolt pose, and forward fold are thought to help calm the body and allow the body to rejuvenate and regenerate.”
Let’s take a closer look at these poses and learn how to perform them properly.
Yoga Asanas For Healthy Hair
Balasana (child’s pose)
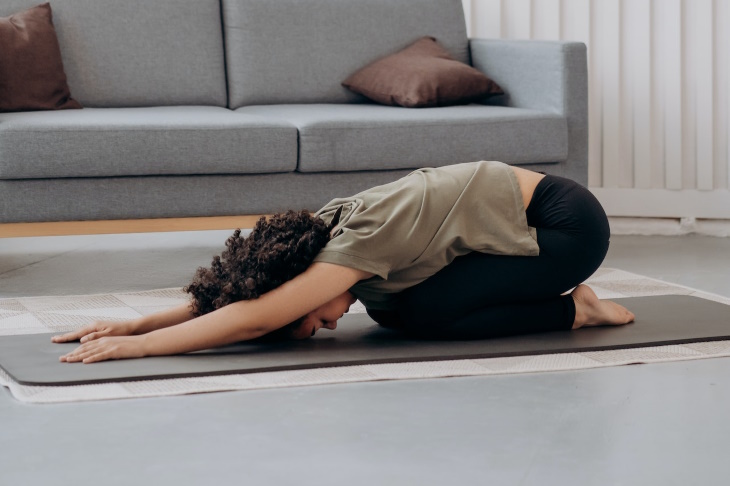
Let’s begin with the most accessible and relaxing pose on this list - the child pose. This pose is a wonderful stress reliever capable of calming the mind as it also gently stretches the muscles of the lower back.
Modifications: For extra comfort, place a rolled-up blanket at the back of your knees. A cushion or folded blanket may be used to support your forehead.
Here’s how to complete this posture:
1. Come onto all fours. Lower into a seat, keeping the thighs slightly apart.
2. Allow your torso to rest on your thighs and keep your arms extended out in front of you, simultaneously elongating your spine.
3. If you have the flexibility, allow your forehead to rest on the floor. Alternatively, you may place your forehead on a cushion or an exercise block.
4. Once in the pose, draw your attention to your breath, breathing at a normal pace.
5. Hold the pose for up to 3 minutes, then lift your upper body to exit the pose.
Related article: 9 Habits that Cause HAIR LOSS. Are You Guilty of These?
Adho mukha svanasana (downward-facing dog)
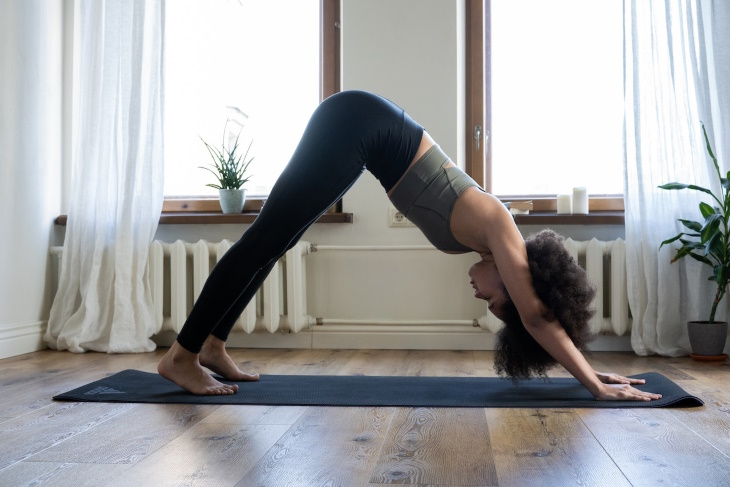
This asana is called the “downward facing dog pose” due to its resemblance to a dog stretching. This transformative pose is a 3-in-one, as it’s a workout for your abs, an inverted pose, and a full-body stretch. Apart from boosting blood circulation to the head, scalp, and neck, this asana improves digestion and relieves stress. This is a beginner-friendly asana that’s best practiced on an empty stomach in the morning.
Note: You can also prop up your wrists with a blanket or towel for added comfort.
Here’s how to complete this posture:
1. Start on all fours – wrists should be aligned under the shoulders and knees under the hips
2. Lift up by activating the hips, arms, and abs. The back should be straight and the head relaxed. Don’t worry if the legs are not completely straight at first.
3. If you can straighten the legs, slowly let the heels move closer to the floor.
4. Hold for 1-3 minutes, breathing deeply.
5. To exit the post, simply lower the hips and return to the starting position.
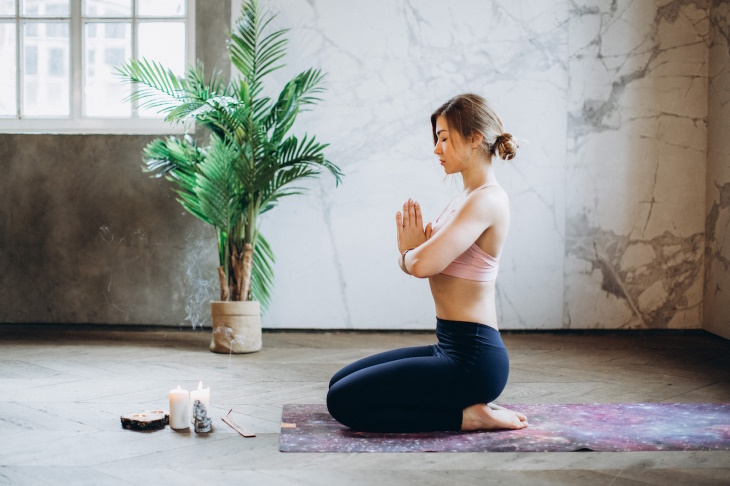
Vajrasana (thunderbolt pose)
The thunderbolt pose is also called the diamond pose. This alternative name stems from the belief that deep breathing work in this asana is said to make the body as strong as this precious stone. Unlike many asanas, vajrasana can be practiced after a meal, as it’s said to be beneficial for constipation and digestion in general. The pose also has a relaxing effect on the mind, and it’s a surprisingly deep stretch for the thighs.
If sitting on the floor is hard on your knees or your sit-bones, place blankets between the floor, calves, and glutes.
Here’s how to complete this posture:
1. Sit in a kneeling position with the tops of your feet flat on the floor. Keep the legs as close to each other as you can.
2. Hold this position for at least 5 deep breaths. Ideally, you should be able to stay in this position for around 5 minutes.
3. To exit this position, move your hands to the front, shift your weight to the knees, and slowly stand up.
Uttanasana (standing forward bend)
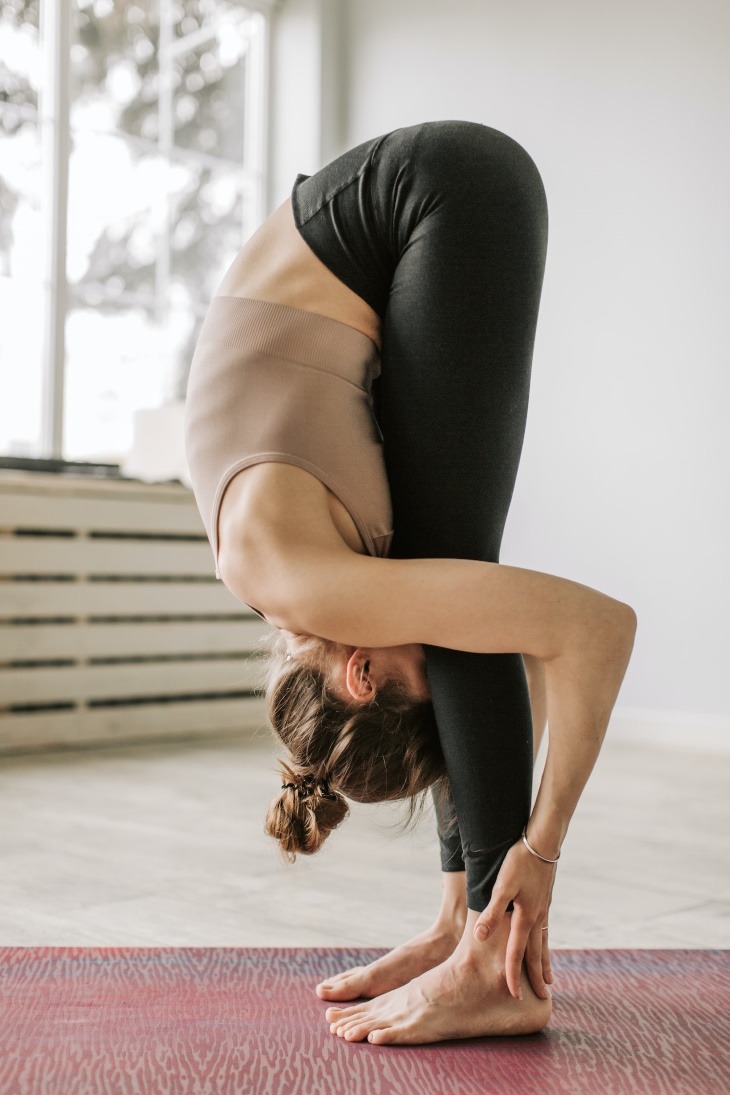
This seemingly simple inverted pose has serious potential to lift one’s spirits and energize the body. This pose improves blood flow to the head and scalp, and it’s particularly known for its uplifting and calming effect on the mind. The folding movement during uttanasana also massages the internal organs and is said to relieve constipation. For maximum results, practice this pose in the morning or at least 4-5 hours after a meal.
Here’s how to complete this posture:
1. Stand with feet under the hips, arms relaxed by your sides.
2. As you inhale, lift the arms above the head. On a long exhale, start bending forward and down, letting the arms fall forward.
3. Allow the palms to touch the ground if they reach it. If they don’t, rest the hands on the shins.
4. The focus of this pose is keeping the back as straight and relaxed as possible. If that means you'll need to bend your knees a bit or a lot, so be it.
5. Hold the pose for 30-60 seconds, breathing deeply.
6. To exit the post, simply rise up on a slow and steady inhale.
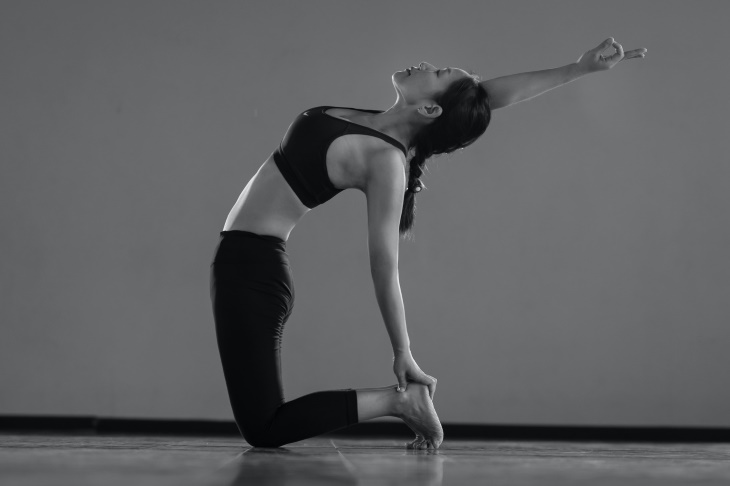
Ustrasana (camel pose)
The camel is the first of a few simple, beginner-friendly backbends featured in this article. This asana offers a deep stretch to the upper back, chest, and shoulders, and it works the abs and the glutes too. Ustrasana boosts metabolism and relieves stress, which will nourish the hair and prevent hair loss. This pose is also said to be beneficial for women’s health.
Here’s how to complete this posture:
1. Kneel down, keeping the knees hip-width apart.
2. Bend backward and try to reach the soles of the feet with your hands – one at a time. Once you got hold of the soles of both feet, start working on the backbend.
3. The gaze should be directed up and back, and the chest should be open and lifted.
4. Hold for 15-30 seconds, then exit the pose by lowering the hips and returning to a seated position.
Sarvangasana (shoulder stand)
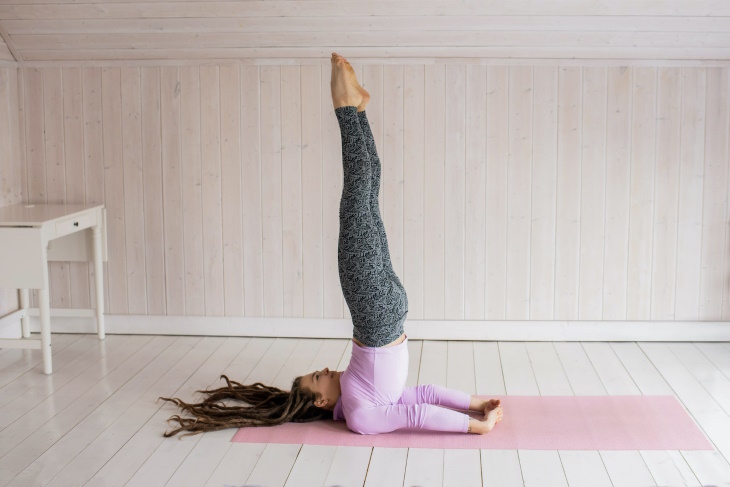
The shoulder stand is an extremely powerful inverted asana that is capable of relieving stress, strengthening the entire body, and improving circulation in the head, neck, and scalp. Some practitioners believe that this asana is capable of relieving symptoms of mild depression, but research needs to be done to truly confirm these claims.
We recommend that you do this pose in the morning on an empty stomach. This way, it will kickstart your metabolism and keep fatigue away throughout the day.
Here’s how to complete this posture:
1. Lie on your back. Hike the legs up toward the chest, and then up. At this point, the legs can be bent in the knees
2. Support the back with your palms as you lift the hips off the floor
3. Start straightening the legs, or stay in this position if this causes pain or makes you lose balance
4. If you straightened the legs and you feel sturdy, you can also straighten the arms. You may also keep the arms supporting the back
5. Hold for 30-60 seconds, breathing deeply
6. To exit the shoulder stand, slowly lower the back onto the floor, followed by the legs and feet.
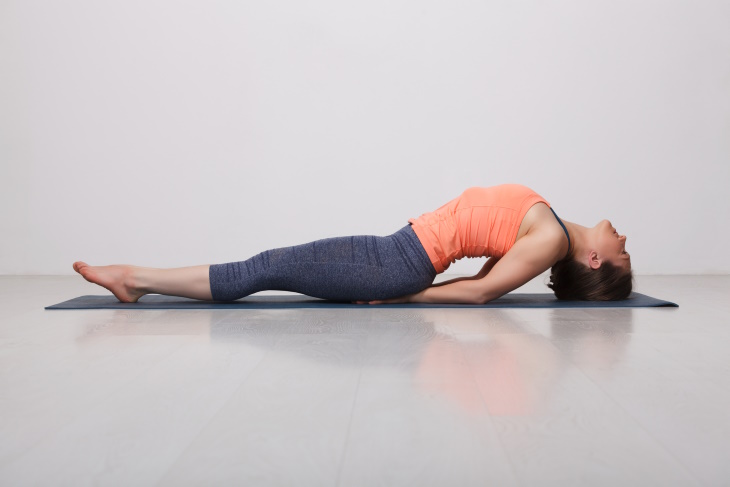
Matsyasana (fish pose)
The name matsyasana comes from the word “matsya” which means fish in Sanskrit due to the pose’s purported resemblance to a fish. Matsyasana is an easy mini-backbend that can be mastered by any beginner. This pose opens the chest, stretches the upper body, and brings fresh blood to the head and scalp.
Here’s how to complete this posture:
1. Begin by lying on the back – legs together and arms by your sides
2. Place the hands flat under the small of the back.
3. On an Inhale, lift the chest as you press both elbows into the floor and scoot them under the chest.
4. Stretch and lift the chest and shoulders, but keep the neck and head relaxed, resting on the floor.
5. Hold for 30-60 seconds, breathing deeply.
6. To exit the post, slowly lower the upper body back to the floor and place the arms along the body.
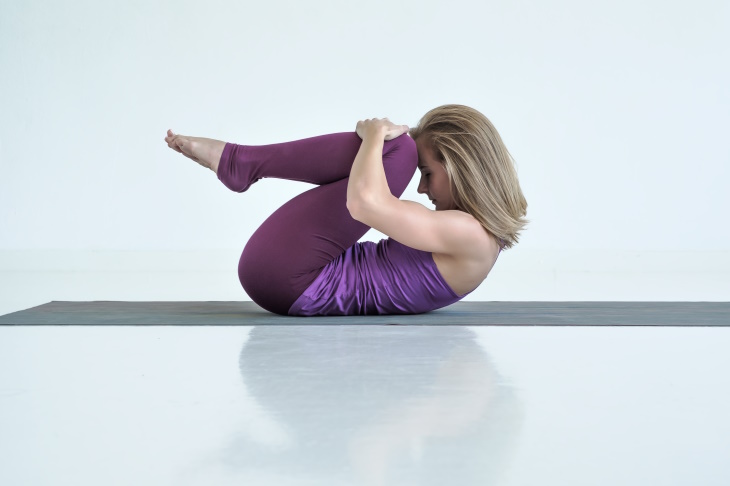
Pawanmuktasana (wind-relieving pose)
The wind-relieving pose does exactly what it sounds like. It does wonders for digestion, massages the internal organs, reduces belly fat, and it’s also profoundly calming. The pose is also beneficial for relieving tension in the lower back. One last advantage of pawanmuktasana is that it’s beginner-friendly.
Here’s how to complete this posture:
1. Lie down on your back – with legs and arms along the body.
2. On an exhale, lift and curl your legs.
3. Bring your knees as close to your chest as you can. Grasp your legs with your arm.
4. Lift your head off the mat in the direction of your knees.
5. Hold for 30-60 seconds, breathing deeply.
6. To exit the position, release the legs and head, and then place your feet on the mat.
Can rubbing nails and pressure points speed up hair growth?
Certain pressure points and the Balayam Mudra (an ancient practice from reflexology that involves nail rubbing) are said to strengthen hair growth. Learn more about these techniques and how to do them here - Use These 6 Pressure Points to Battle Hair Loss
How often should you practice yoga to see benefits?
Apart from improving your general fitness level, these yoga poses boost blood circulation to the scalp, stimulate hair growth, and strengthen hair strands. It’s best to practice yoga daily for 20-60 minutes. However, you’ll see benefits even if you practice 2-3 times a week.
 Go to BabaMail


