
If you love gardening but live in a colder climate, you know that sad feeling when some plants you’ve cultivated and cared for don’t survive the winter. Not only that but starting over can be costly and time consuming. Another issue that cold climate presents is that certain plants don’t typically grow in low temperatures (watermelons, for example).
As a gardener, you can appreciate the value of a greenhouse, but they usually cost an arm and a leg to purchase or construct. However, if you follow this easy guide, you’ll be able to build your own greenhouse for very little money.
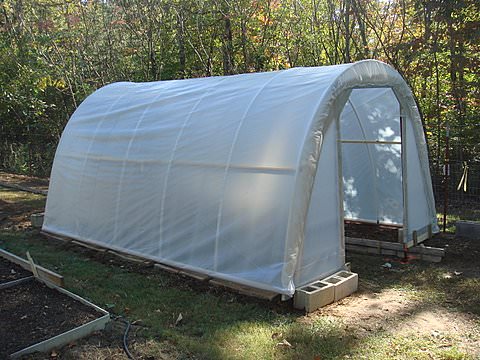
This fun project can take a few days to complete, but the results look very polished. The greenhouse is sturdy and able to withstand quite a bit of snowfall.
Here’s what you’ll need:
Instructions:
Begin by building the end side.
Attach a PVC pipe to a piece of 1x4 to get an outline. Don’t try to make the arch wider to get more space, a tall arch is better at draining rain and snow.
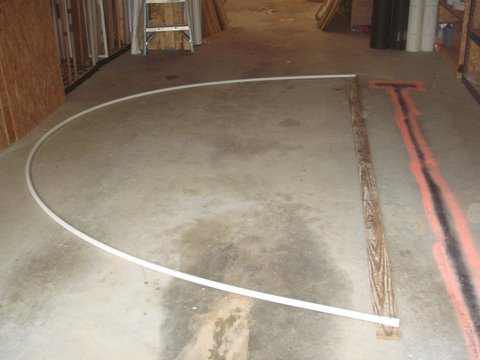
Build a frame for the door, leave about 3’ space for the door in the middle.
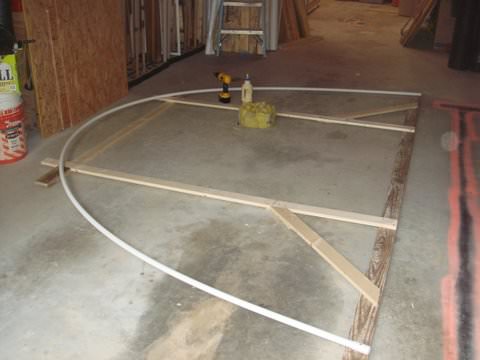
Mark the wood to be in line with the bottom of the pipe.
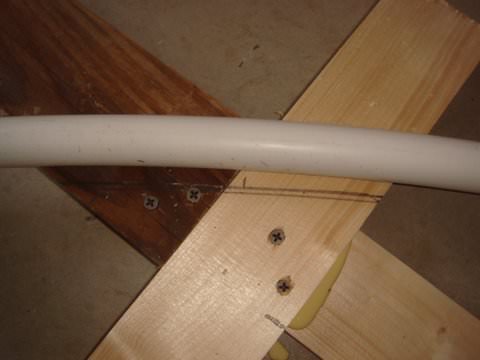
Cut the top ends of the frame that you’ve marked so that the pipe can rest atop them. This is to prevent splinters from tearing the plastic sheet. Screw the pipe into the cut frame.
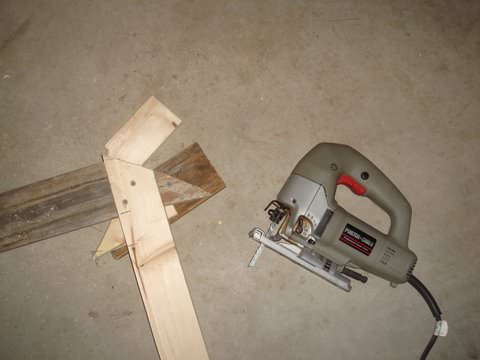
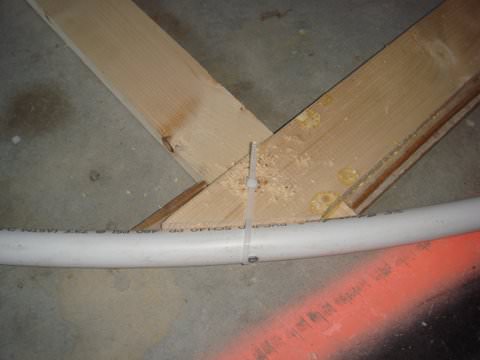
You can use some plywood to add rigidity and durability to the frame.
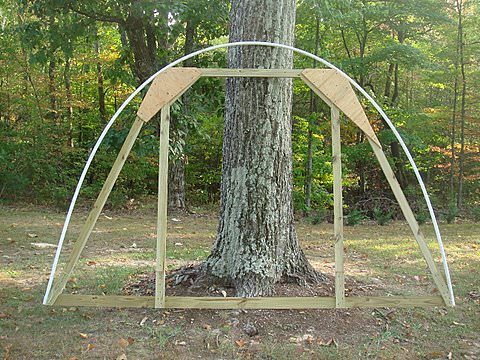
Spread the plastic sheet on the frame, making sure to cut it neatly with a utility knife.
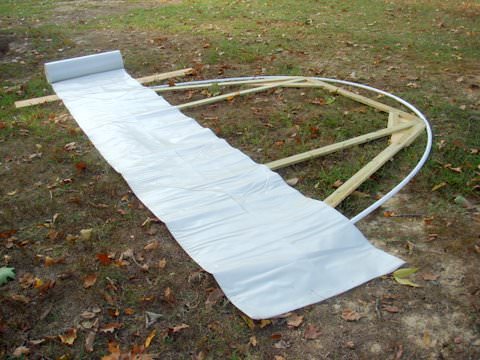
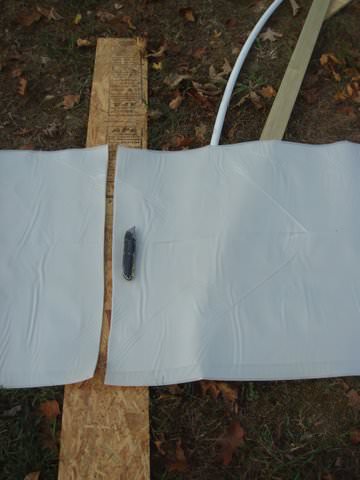
Fold the plastic sheet and use a strong stapler to attach the plastic sheet to the wooden beams and trim any excess plastic.
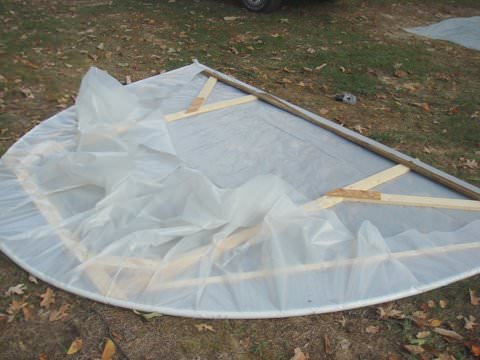
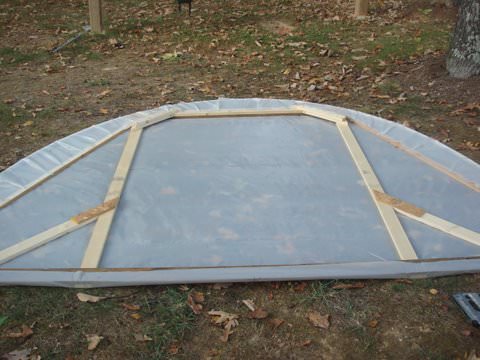
Cut an opening in the doorway, but leave some extra sheeting to fold inside, for a more polished look.
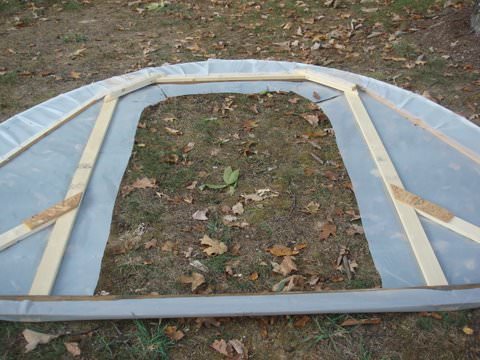
Fold the extra sheets you’ve left and staple them to the wooden frame.
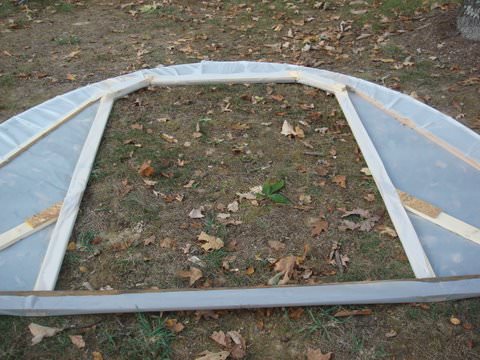
Measure the width of the frame and drive fence posts into the ground. Make sure the posts are straight, otherwise your greenhouse may become unstable.
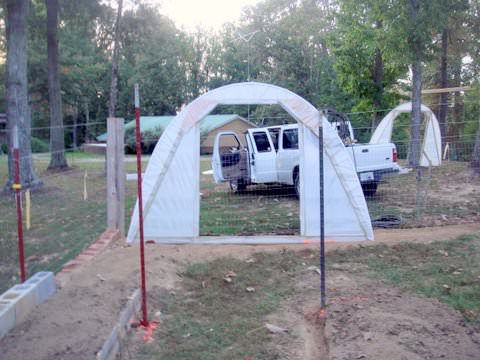
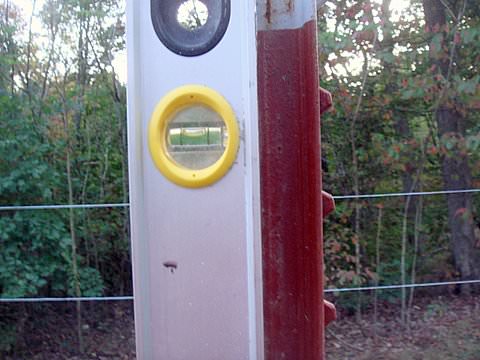
Use strong zip-ties to attach the frame to the stakes.
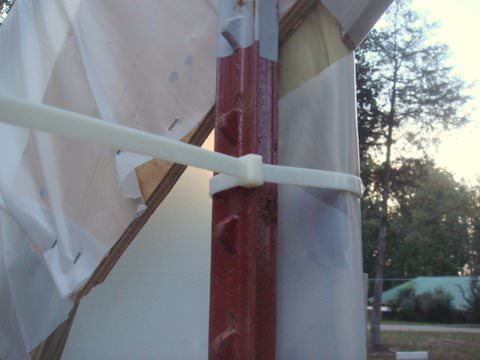
Repeat the above process to build a rear frame. This will ensure that your greenhouse is stable. If you plan on using another wall in the back, proceed to the next step.
Use a string to mark the line where the ribs will stand, and then drive rebar pins every 3’.
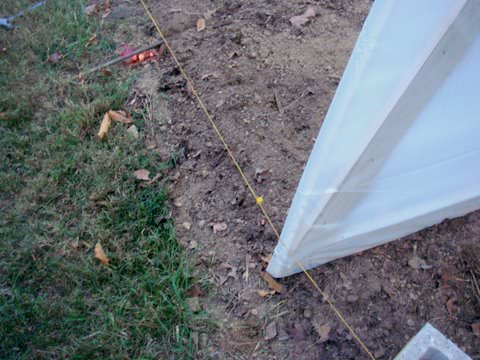
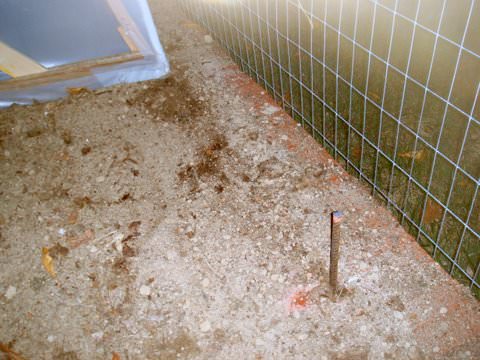
Insert the PVC pipes and form the ribs of the greenhouse. For a sturdier structure, use more ribs.
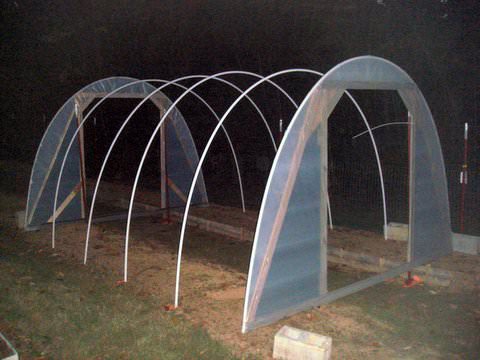
Use 2 long planks on either side to strengthen the structure, as seen in the photo. Screw each rib into each plank.
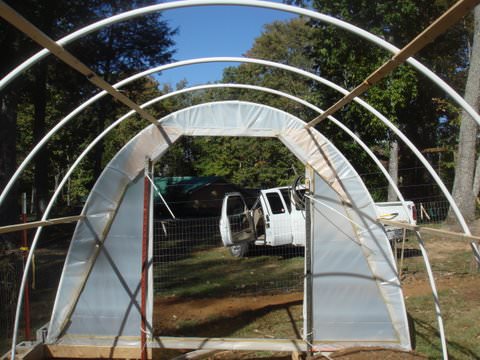
Use a PVC pipe to form a final beam at the top – this will come in handy during heavy rain or snow. Screw the top pipe to each rib and the frames.
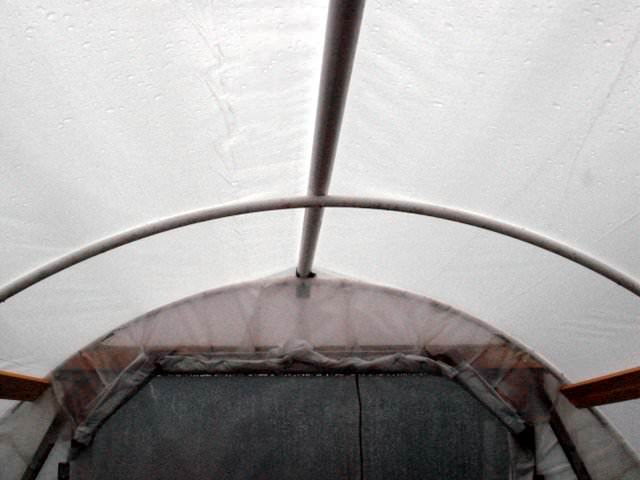
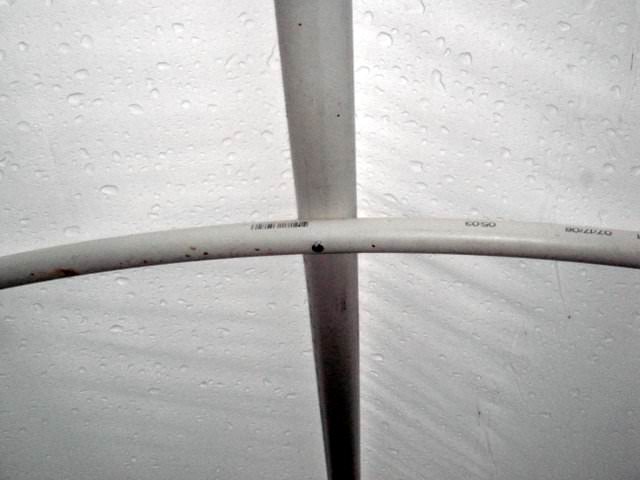
Stretch the metal wires diagonally from one side of the frame to the opposite side, forming an “X” on either side. This will add support to the plastic sheets, making the greenhouse more durable.
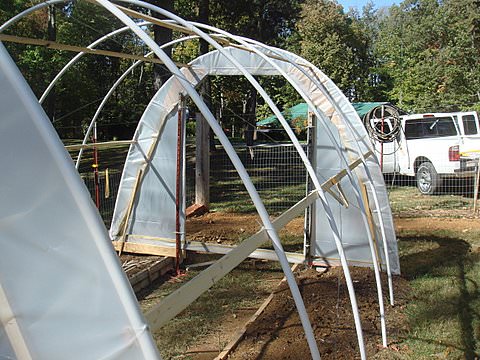
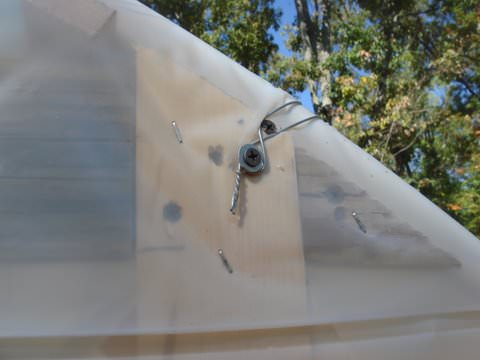
Measure and cut the plastic sheet. You will want to have a little extra on both ends, and in the front and rear.
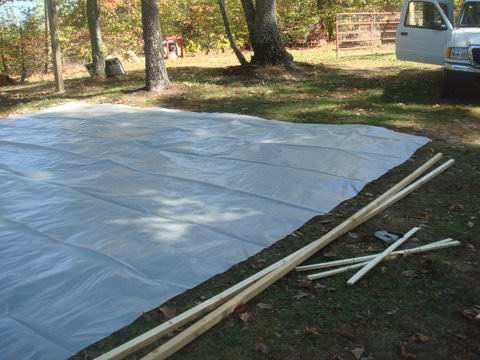
Place a plank on each end and staple the sheet to each one.
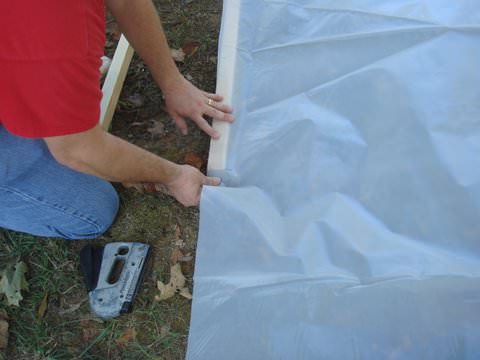
Fold the plank to cover it completely with the plastic sheet. Use another plank and screw it into the wrapped plank to add weight and keep the sheets secured.
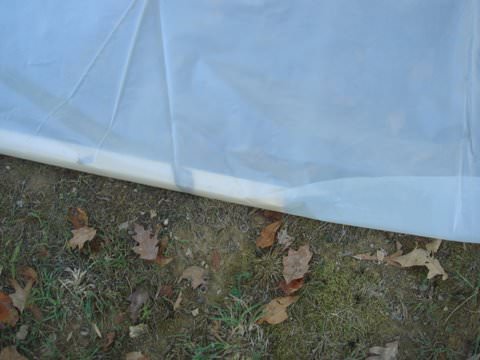
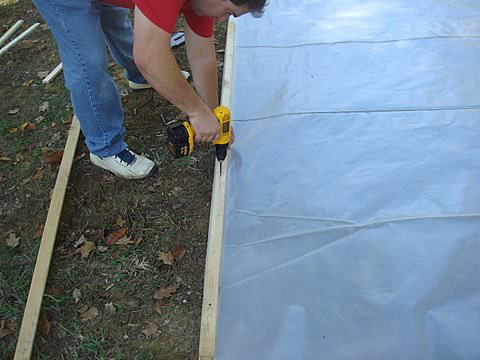
Cover the greenhouse with the sheet, making sure to add weight on one side before stretching the plastic over the construction.
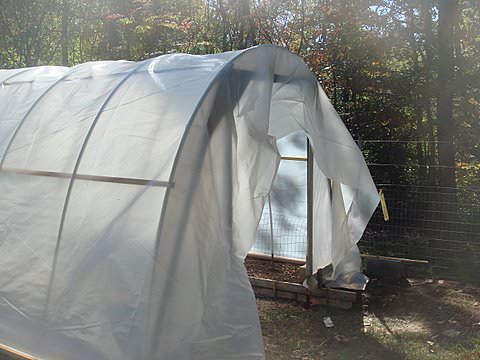
Once covered, secure the other end of the sheet to the ground as well, then secure any loose plastic on the front and back.
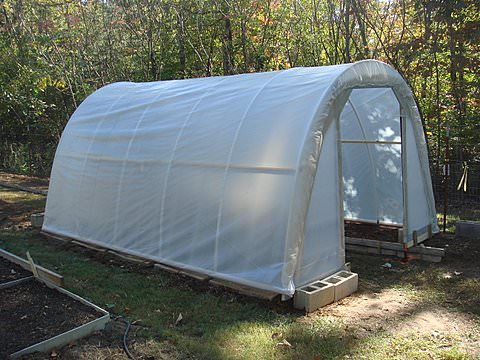
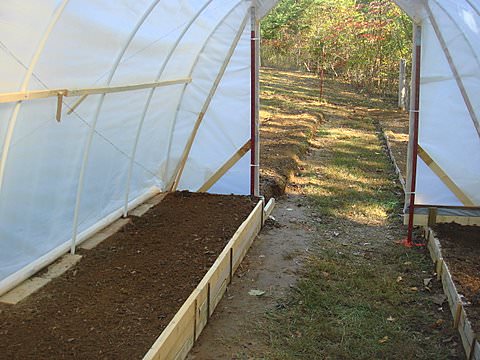
You can now use 2-3 planks on each side to form planters, just like in the picture below.

Safe & Natural Recipes to Add Scent to Your Home
Forget those fake, unhealthy air fresheners and chemical-packed scented candles. Make your own natural scents and keep your home fresh.
This Rake-Free Tip Will Make Your Lawn Sparkle All Winter
Raking fall leaves is beyond irksome - and you don't even need to do it! Find out about this amazingly simple rake-free tip for your lawn.

These Flowers Add Color With Very Little Gardening Effort
If you want to have a colorful summer garden but don't fancy dedicating all your free time to it, all you need are these 12 flower varieties. Read on for more.
18 Ideas for Easy-to-Make and Creative Bird Feeders
18 great ideas for making bird feeders and birdbaths at home.
14 Tips to Give Tired Old Furniture a New Lease On Life
Have you got a pieces of furniture or fixtures and fittings that are looking tired? Try these 14 tips to give them added longevity and a new lease of life.
Give Old Furniture a New Lease of Life with These Tips
Give your old furniture a new lease of life with these 14 tips.

A Cheap and Easy Way to Remove a Scratch from Your Car
If you find a scratch on your car you can remove it yourself at home for just a couple of dollars. Here is how to do it.

Say Goodbye to Rotten Fruits & Veggies with These 12 Tips
The way you store your groceries can affect their shelf life. These 12 tips will help keep your fruits and vegetables fresh for longer.

The Full Guide to Becoming a More Confident Person!
Confident people get what they want in life, and now you can too with these tips to help you strengthen your own self-confidence!

Got a Pair of Suede Shoes? This Is How to Care For Them
Care for suede shoes easily with these essential tips.
 13:17
13:17
Learn the Best Sleeping Position to Relieve Neck Pain
aking up with neck pain? Your sleeping position might be to blame!

How to Make an Effective Cough Remedy Using an Orange!
Oranges are a great source of vitamin C that helps strengthen the immune system, but did you know there is a way to make it an effective cough medicine?

Want to Clean Like a Professional? Here's How...
Have you ever wondered how professional cleaning teams manage to get their work done so quickly and with such spectacular results? Learn their secrets here...

Store Potatoes For Months With These Simple Tips
If stored properly, a bag of potatoes can last for months! Here are 7 tips that will extend the shelf life of potatoes considerably.
 11:20
11:20
The Ultimate Food Hack Tips!
10 minutes of terrific food tips, all in one great video.

The EASIEST Plants to Grow in Containers
If you’re wondering which plants work best in container gardens, you’ve come to the right place.

Learn to Dance All the Popular Dances In One Place...
Get your first beginners friendly dancing lessons in 10 genres, starting from the aristocratic waltz and ending with some fun disco moves...

Become the Perfect Host With These 15 Clever Tricks!
Hosting friends and family for meals or birthday parties is fun but also tiring at times. With these 15 tips, you can now easily and effortlessly entertain!

Use These 5 Pressure Points to Control Your Hunger
The following 5 pressure points that you will learn about will help you control your hunger effectively.

9 Dangerous House Smells You Should Never Ignore
If something smells off to you, there is probably a good reason. These are 9 potentially dangerous house odors you should never ignore.
 14:52
14:52
Here Is the Secret For Making the Perfect Hamburger
This video is for those of you who are hamburger enthusiasts and want to learn everything there is to know about making a savory burger.
Fix Any Fence Problem With These 10 Video Tutorials!
10 video tutorials that'll cover most fence DIY issues, from fixing various issues to installation and painting.
 3:40
3:40
Shocking! You Must Watch This Video About Child Safety
This social experiment reveals a shocking fact about child safety in parks. You definitely need to watch this!
 1:32
1:32
Got a Zipper Problem? Here's How You Can Fix It!
Got an issue with your zip? Here's what to do about it.

The Ultimate Guide to Getting Rid of Moths in Your Home
This guide will walk you through identifying the type of moth, eliminating the current infestation, and implementing long-term prevention strategies.

14 Useful Charts and Guides You’ll Want to Save!
We prepared a list of 14 visual guides and charts that will come in handy at home, outdoors, and even when you’re searching for something online!
Guide: Did You Know About These Extra Uses?
This collection features the best tips and alternative uses for many of your household items. Each of these posts has a lot of information for alternative uses to make your lives easier.
 4:57
4:57
Bob Proctor: How to Attract the Right people to Your Life
The video provides inspiration and hope for anyone seeking to strengthen their personal connections and create a supportive environment for success and fulfillment.

Downsizing? Here's What to Do When Moving in
Consider downsizing? Here are a few useful things to consider before, during, and after the move.
 11:37
11:37
How to Grow Store-Bought Ginger at Home in a Pot
It turns out that it's quite easy to turn one ginger root you bought at the store into a never-ending supply of ginger goodness! Learn how to do it here

How to Clean 'Dry Clean Only' Clothes at Home
Dry cleaning can be a huge hassle, as well as quite the expense, which is why it is so much better to do it yourself at home...

14 Ways to Enhance the Flavor of Your Cooking
We have collected 14 brilliant tips for you that will help turn your cooking and dining experience into an enjoyable and satisfying action.

Weeds Stand No Chance Against This Fantastic Weed Killer
How does a practically free, home-made, all-natural weed killer that's kind to the environment sound? Amazing, right? Here's how to make your very own.
How to Make Organic Pesticides Using Plants in Your Garden
Got some annoying critters in your garden eating all your plants? Try these natural pesticides!
10 Fantastic DIY Tips Ideas for Kids You Have to Try
Whether you've a lot of time or just a little, there are some DIY tips here that will breathe new life into your child-grandparent relationship.
 28:22
28:22
Here’s Why Everyone Should Try 'No-Dig' Gardening
Grow plants year round with the no-dig gardening method.

People Really Have No Idea What These English Words Mean!
A lot of people think they know how to use English words correctly, but they really don't! Here are 21 most misused words in the English language

14 Terrific Charts to Satisfy Your Thirst For Knowledge
If reading long articles on a specific topic isn’t your preferred way to spend your pastime, these clever charts and maps might be just what you need.

Want to Attract Bees to Your Garden? Here's How!
Having honey bees buzzing around to act as pollinators brings life to your garden. Here's how you can attract them!

7 Household Chores That You Should Do Less Frequently
Keeping up with our homes can take a lot of time and energy. But not all of them are worth your time and effort.
 15:30
15:30
Live an Easier Life With These 24 Everyday Tips!
This video offers 24 different tips for everyday problems.

10 Unexpected Handy Uses for a Hairdryer
The hairdryer is one of the more useful appliances we have - here are 10 unexpected and super handy uses for a hairdryer.
Keep Your Shoes in Top Shape with These Tips and Tricks
Learn how to always keep your shoes in top shape, no matter their age or fabric. I guarantee, it will save you a lot of money because you won’t have to buy new shoes so often anymore.
15 Ways to Get the Best Results From Your Slow Cooker
The slow cooker is pretty easy to use. However, there are some simple rules that you should follow in order to get the best results. Check them out here.

The ULTIMATE Guide for Using Foods for New Purposes
This guide will give you the useful tips and helpful information you need to find alternative uses for most of your common food products. You'll be amazed at the surprising uses for some of these common food items.

Unsure About Retiring? Here's Why You Should Wait
Are you financially prepared to retire? Look out for these signs.
 12:30
12:30
10 Things You Didn't Know About Power Outlets
Today we're diving deep into the hidden world of power outlets, uncovering ten incredible facts that will completely change how you see these humble wall fixtures forever.
To enable your Ad-Free Subscription, please fill the fields below
Your subscription was successful, now you can enjoy an ad-free experience!! Note: To make sure you get no ads, please make sure to log in to your account. If you are logged in already, then refresh the page. The subscription can be cancelled at any time.


