When was the last time you gave your toilet tank a proper cleaning? Let’s be honest—cleaning the toilet isn’t anyone’s favorite chore, but it’s one of those tasks we can’t avoid. While most people focus on the bowl, the toilet tank often gets overlooked. However, keeping the tank clean is just as important.
Over time, grime, mold, and mineral deposits can build up inside the tank, which can affect both the toilet’s performance and the quality of your bathroom environment. Regular cleaning not only prevents these issues but also extends the life of your toilet’s components.
Related: Repair a Running Toilet in No Time With These 4 Tips
Cleaning a toilet tank may seem intimidating, but it’s simpler than you think. Follow this step-by-step guide, and in no time, you’ll have a sparkling clean tank that keeps your bathroom running efficiently! Let's get started.
Gather your supplies

Gather everything you need before you start cleaning your toilet tank. You’ll need rubber gloves, a sponge or soft cloth, a toilet brush, baking soda, white vinegar, and a bucket or container to catch any water. If you prefer, you can also use a commercial toilet tank cleaner, but natural options like baking soda and vinegar are great alternatives. Don’t forget to have some old towels or rags on hand for any spills.
Once you’re fully equipped, you’ll be ready to tackle the task without any interruptions. A little preparation goes a long way in making cleaning a breeze!
Step 1. Turn off the water supply
Before starting any cleaning, locate the water supply valve, typically found on the wall behind the toilet. Turn it off by rotating it clockwise. This will prevent water from flowing into the tank while you’re cleaning. Once the valve is off, flush the toilet to drain most of the water from the tank.
Some water will remain at the bottom, but this is normal and can be soaked up with a sponge or towel. Cutting off the water supply ensures that you can clean thoroughly without dealing with a constantly refilling tank. Always remember to check for leaks after turning the water back on.
Step 2. Remove the lid and inspect the tank

Carefully lift the tank lid and set it aside on a flat surface to prevent it from breaking. Once you have access to the tank, take a moment to inspect its interior. Check for any rust, mineral buildup, or debris that might be present.
It’s also a good opportunity to look for any cracks or leaks that might need fixing. Pay special attention to the condition of the components inside the tank, such as the flapper, fill valve, and chain. A quick visual inspection will help you identify if any parts need replacement before you proceed with cleaning.
Step 3. Drain the remaining water

Though flushing the toilet will remove most of the water, a small amount will still be left at the bottom of the tank. Use a sponge, towel, or a small cup to soak up or scoop out the remaining water. Ensure the tank is as dry as possible before you start scrubbing, as this will help the cleaning solution to work better. If any debris is stuck at the bottom, gently dislodge it while removing the water. Excess moisture creates a hostile environment for cleaning products, making them less effective at breaking down buildup.
Step 4. Scrub the interior with vinegar or a cleaner
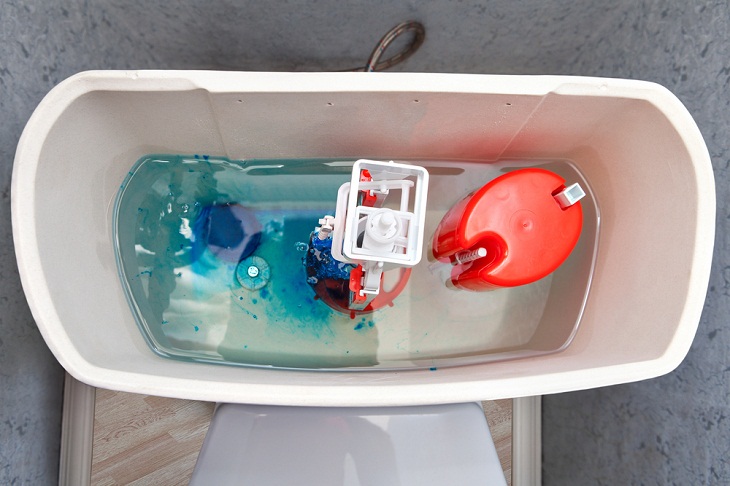
Prepare a cleaning solution using vinegar or a specialized toilet tank cleaner. Pour enough vinegar into the tank to cover the areas with visible buildup or rust, and let it sit for about 10-15 minutes. The vinegar’s acidic properties will help dissolve mineral deposits. Then, using a scrub brush or sponge, gently scrub the sides, bottom, and any components inside the tank. Be thorough but avoid using anything too abrasive that could damage the tank. Rinse with water as you go, ensuring that all the grime and buildup are properly cleaned off.
Step 5. Clean the tank components
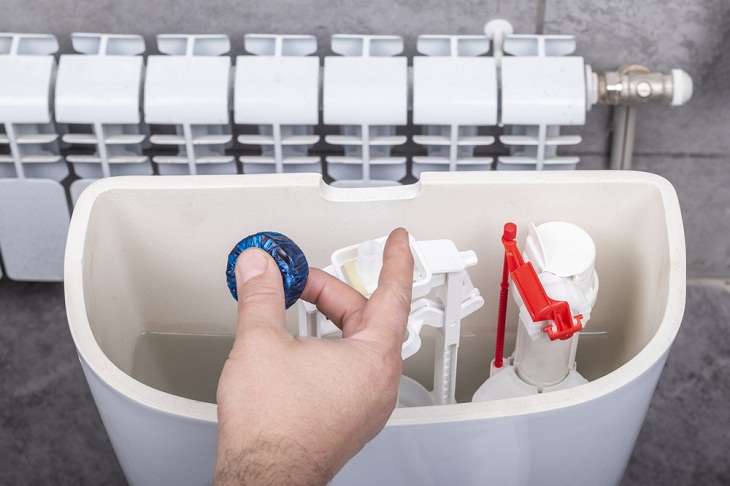
Now that the tank is scrubbed, focus on cleaning the individual components like the flapper, fill valve, and overflow tube. These parts are prone to mineral buildup and grime over time, which can affect their performance. Gently scrub each piece with the same vinegar or cleaner solution using a soft brush or toothbrush. Pay extra attention to the flapper, as a dirty or damaged one can cause the toilet to run continuously. Make sure all parts are rinsed clean and free from buildup before moving on. If any part looks excessively worn or damaged, consider replacing it.
Step 6. Rinse the tank thoroughly
After scrubbing, you’ll want to make sure all cleaning residue and grime are thoroughly rinsed out of the tank. Refill the tank with water by turning the water supply back on briefly. Let it fill a little, then flush it out again to remove any remaining debris or cleaning solution. Repeat this process until the water inside the tank looks clean and clear. This step ensures that no cleaner residue remains that could potentially corrode or damage the components over time. A well-rinsed tank also keeps your toilet running smoothly and efficiently.
Step 7. Reassemble and refill the tank
Once your tank is thoroughly cleaned and rinsed, it’s time to put everything back together. Ensure all components are properly aligned and functioning, especially the flapper and chain. Reattach the tank lid carefully, and turn the water supply back on. Let the tank refill, and then test it by flushing to make sure everything is working as it should. Listen for any unusual sounds or signs that something might still be off. If everything is working fine, you’ve successfully cleaned and maintained your toilet tank!
Tips for maintaining your toilet tank
To keep your toilet tank in top shape, consider the following tips.
- Regular cleaning: Clean your toilet tank every few months to prevent buildup.
- Check components: Inspect and replace worn-out parts like the flapper and fill valve annually.
- Use mild cleaners: Avoid harsh chemicals that can damage the tank’s interior.
- Fix leaks promptly: Address any leaks immediately to prevent water waste and damage.
- Ventilate: Ensure good ventilation in the bathroom to reduce moisture and prevent mold growth.