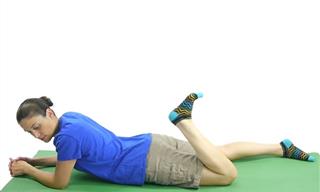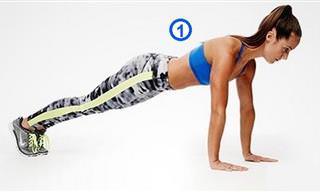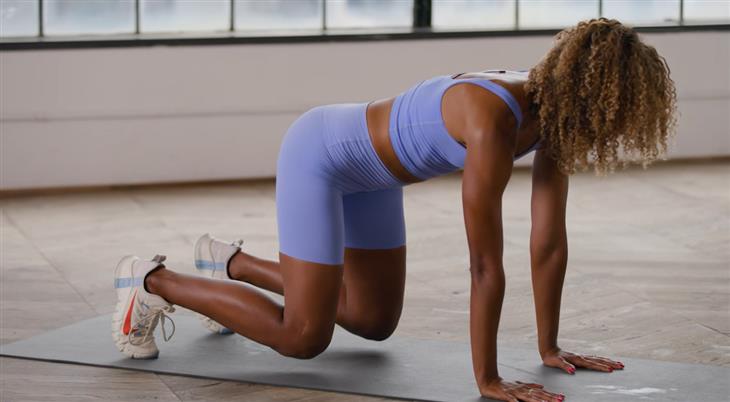
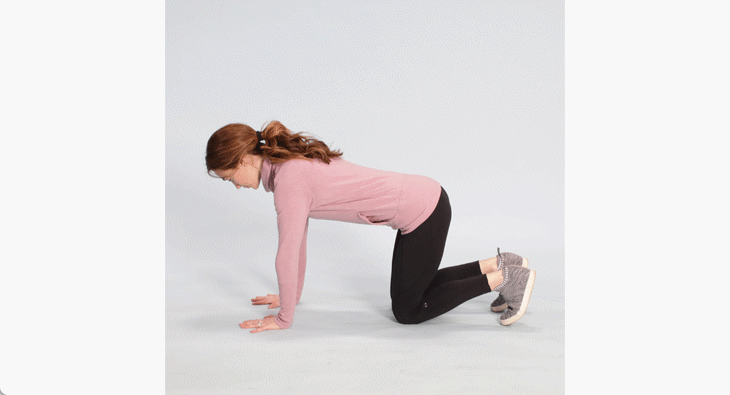
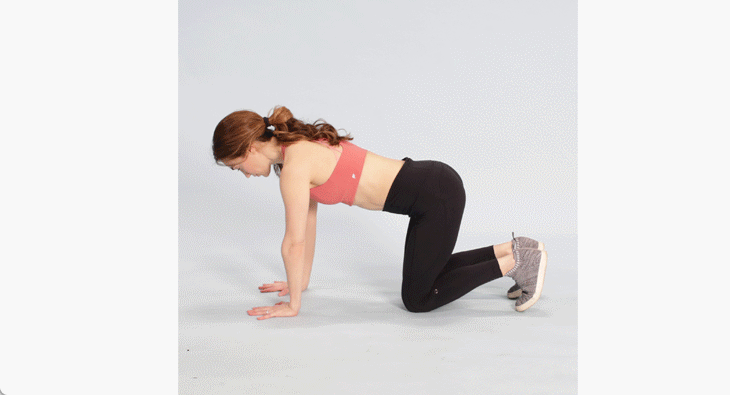
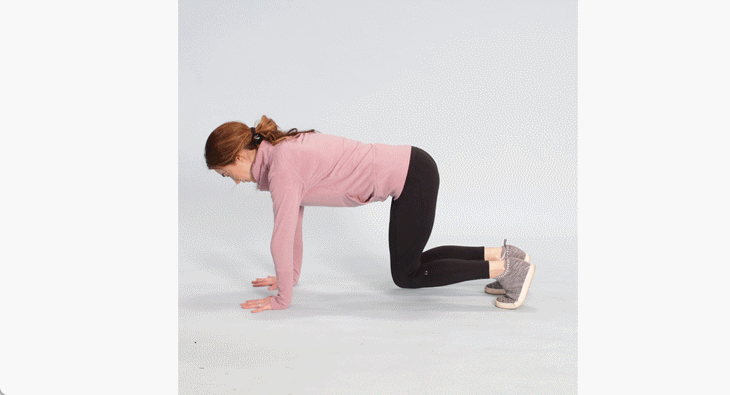
1. Start with your hands, knees, and feet on the floor, with your toes pressing against the ground.
2. Engage your chest and shoulder muscles so they press against the floor. Your weight should be evenly distributed between your fingers, palms, and the base of your hands.
3. Squeeze your glutes and tuck your pelvis inwards.
4. Take a deep breath and tighten your abdominal muscles as if bracing for a punch. Your lower ribs should move slightly towards your pelvis
5. Lift your knees about an inch off the floor so they hover slightly above it. Keep your chin and head in a natural position, with your eyes looking directly at the floor beneath your head.
6. Breathe regularly, maintaining your mid and lower back in a straight and slightly arched position. Avoid arching your back or letting your abdomen drop towards the floor.
7. Hold this position for at least 20 seconds. As you practice more, you can hold it for longer, aiming for 3 sets of 60 seconds.
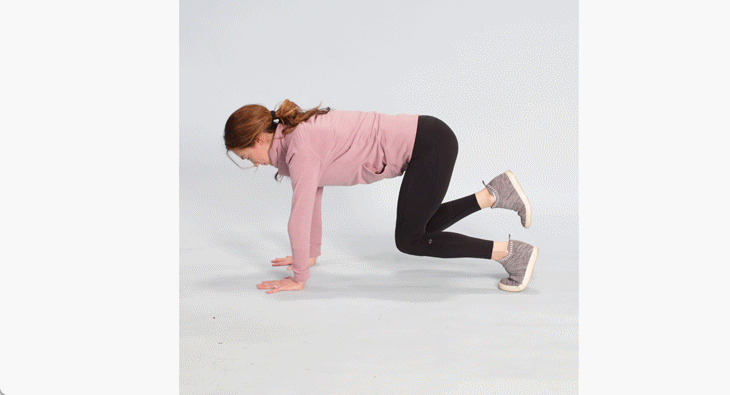
1. Follow steps 1-5 of the Bear Plank.
2. With your knees off the ground, lift one leg off the floor for one second.
3. Return the leg to the floor and repeat the exercise with the other leg.
4. Perform 3 sets of 10-20 leg lifts (5-10 per leg).
1. Follow steps 1-5 of the Bear Plank.
2. With your knees off the ground, lift one leg and lower the pelvis on the same side towards the floor, while rotating the body and bringing the leg for a kick towards the opposite side through the gap between the other leg and the floor
3. Return the leg to its place in a controlled motion and repeat the exercise with the other leg
4. Perform 3 sets of 10-20 kicks (5-10 per leg).
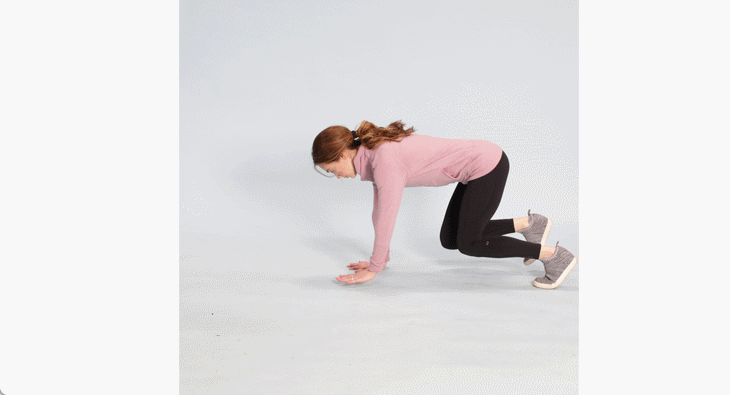
1. Follow steps 1-5 of the Bear Plank.
2. With your knees off the ground, lift one leg and bring the knee about 12 inches forward before lowering it back.
3. Repeat with the other leg and continue walking forward and backward, depending on the size of the space you are working out in.
4. Perform 3 sets of 10-20 steps (5-10 per leg).