

Make ListenOnRepeat Your New Music Hub With This Guide
This guide will teach you how to use this great new music site entitled ListenOnRepeat. Keep track of your favorite artists and trending music all in one place.

Before You Answer That Email, Here are a Few Tips
Here are 9 common situations that require a response and the recommended and less recommended ways to say what you want.

How to Choose the Perfect Laptop For Your Needs!
Are you thinking of getting a new laptop but can't wrap your head around all the terms and sizes? This guide will make things easier for you.

Computer Guide: How to Format Your Computer - PC & Mac
how do we create a new computer from the old, formatting it and making it work like new? This guide will show you!

Use This Backup Guide to Ensure You Never Lose Files Again
This article wil show you how to create three different backups (a bootable backup, an external backup drive and a cloud backup) for your Windows computer.

5 Programs You Should Remove from Your Computer
This article specifies 5 programs that most people don't need on their computers and how to get rid of them.

7 Tips to Follow When a Computer Hangs or Freezes
Take note of these steps that will help you unfreeze a computer that freezes or hangs regularly.
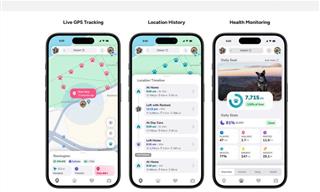
Top 5 Apps for Checking on Your Pet’s Health
These apps were selected based on their functionality, user reviews, and relevance to health monitoring, as highlighted by pet care and technology sources.

Learn Any New Language with These Awesome Apps!
Learn new languages faster with these AI-powered apps.

Computer Guide: Comparing Skype and Microsoft Teams
This article will explain why Skype is going away, how Teams fills its shoes, and guide you through using Teams for your personal video calls, screen shares, and chats.

Did You Know These Cell Phone Facts Are All Totally False?
People just love to give you advice about smart phones, but it turns out that a lot of this information is false. Never believe these 9 smart phone myths.

Do You Eat Out Often? These 7 Apps Will Save You Money!
If you’re struggling to keep up with your monthly food budget, you’re not alone. Here are 7 dinning apps that will save you money every time you eat.
 23:04
23:04
ChatGPT: 30 Tips to Using and Working with the AI
In this video, we’re breaking down 30 practical tips to help you use ChatGPT more effectively
 12:38
12:38
Skype is Dead: 9 Features of Microsoft Teams
These nine lesser-known tools are a must for any Microsoft Teams user.

5 Best Online Platforms for Couples' Counselling
We've researched the options and returned with the 5 best platforms for online couples' therapy.

These Apps Make Every Photo Look Amazing!
No satisfied with your smartphone photos? Try these super apps today!
 2:35
2:35
6 Simple Tips for Taking Screenshots on Windows
Taking screenshots on Windows is now super easy. Just note these tips.

5 Best Antiviruses in 2025 for Both PC and Mac
Below, we highlight five popular antivirus solutions for Windows PCs and five for Macs, featuring a mix of free and paid options.

7 Reasons Why Your Computer is Running Abnormally Slow
There are many things that could be slowing your computer down and you'll find 7 of them in this article. Take a look!

Do You Know How to Act in a Medical Emergency?
Don't feel powerless in a medical emergency, learn what actions to take in these 10 serious medical emergencies and how to save lives

7 Websites With Free Useful Apps for Your Computer
we've gathered 7 recommended repositories where you can find almost any software you might need for Windows – and at no cost!

You Didn’t Realize it, But AI Is Making Your Life Better!
Here are thirteen unique ways AI can simplify daily life.

You Can Now Speak With ChatGPT on Your Whatsapp!
et’s explore what 1-800-ChatGPT offers, how to use it effectively, and why this innovation makes interacting with AI more seamless.

Thirsty For Knowledge? Check Out These YouTube Channels
If you love to learn new things with each passing day, then get ready to discover a gold mine full of educational tools!
Busting 12 Password Myths to Safeguard Your Online Life
Don’t fall for these common password myths.

Surround Yourself With the Forest Sounds of the World
Ready to be surrounded by the music of the world’s forests and experience the restorative properties of being in nature?
 2:09
2:09
Guide: Download Netflix Videos on Any Laptop & PC
Want to watch your favorite Netflix content offline? This easy guide has you covered.

Computer Guide: How to Clear Space on Your Google Account
How to easily free up storage space on your Google Drive without paying for more storage.

Boost Your Brain With These 8 Brainy Mobile Games!
We’ve gathered 8 recommended games to keep your brain active, challenge your logical thinking, and help you pass the time enjoyably.
 5:23
5:23
Phone Security– The Fastest Way to Secure a Hacked Phone
This guide helps you in checking for hackers on your phone, removing them, and locking down your phone.
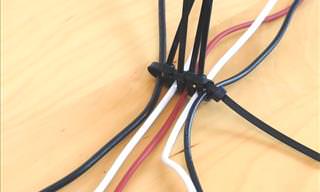
5 DIY Solutions to Better Organize Your Cords and Cables
Computer cables have an annoying tendency to tangle and create an unseemly mess. Here are some easy ways to prevent that.

All You Need to Know About Your Computer
It's that age of computers, and we should all educate ourselves so we all save ourselves time and anxiety when using a computer, a tablet or a phone. This collection of posts will give you insight into many computer-related issues.

Privacy Settings You Should Change in Chrome Right Now
These Chrome settings should always be disabled.
 1:55
1:55
Never Lose Your WhatsApp Chats Again with These Hacks!
Protect your WhatsApp chats with these tips.

What To Do When Windows Will NOT Boot
There's nothing more frustrating than your computer refusing to boot. Here is what you can do to fix it when the system won't even initialize.

If You Do This, Then You Could Be Damaging Your Phone...
Many people end up damaging their phones without even realizing that they are doing so, and here are 9 of the most common ways this happens.

Your Computer Mouse Can Do Much More Than You Think...
Knowing how to use your mouse can make computing so much easier than you ever realized. Here are some great tips on how to maximize the use of your mouse, which will increase your overall productivity on the computer.

What Causes Laptop Batteries to Bulge Over Time?
These early warning signs can save your laptop's battery and prevent potentially dangerous situations.

Stop Paying For Software: 8 Free Productivity Options
Here are eight free open-source alternatives that can take the place of paid productivity apps without sacrificing quality or functionality.
 2:27
2:27
Tutorial: How to Uninstall Apps on Your Windows 11 PC
How to uninstall apps on your windows PC.
Guide: How to Sign a PDF Without Printing it First
This guide will teach you how to sign PDF files digitally without having to print them.

Exploring the Web Beyond Google: 7 Handy Alternatives
Try some of these non-conventional search engines that you didn't know existed.

12 USEFUL Chrome Extensions That Save Time
Improve your browsing experience with these free Google Chrome extensions.

Gboard Secrets: 7 Handy Features You're Not Using Yet
Make the most out of Gboard with these awesome tips and tricls.
 1:56
1:56
No More Clutter! Free Up WhatsApp Storage in Minutes
Running out of storage on your phone because of WhatsApp? Try these hacks now.
 4:08
4:08
Guide: Download All Google Photos in a Few Clicks!
Want to download all your Google your photos and videos in a few clicks? Watch this…

PowerToys: The Best Free Microsoft App for Windows Users
In this article, we'll introduce you to this toolbox and show you which 23 useful tools are waiting for you there.
To enable your Ad-Free Subscription, please fill the fields below
Your subscription was successful, now you can enjoy an ad-free experience!! Note: To make sure you get no ads, please make sure to log in to your account. If you are logged in already, then refresh the page. The subscription can be cancelled at any time.


